In this article, we will learn how we can create “AWS EC2 instance” and advantages of AWS EC2 instance. But before creating an EC2 instance we need to know what is AWS EC2 ?, For this, I have already published an article, you need to know “What is AWS EC2 ?”. Now you know about the AWS EC2, Let’s learn “How to create AWS EC2 Instance”.
Step 1: Login into Amazon Console page using account Id, IAM User name and Password.
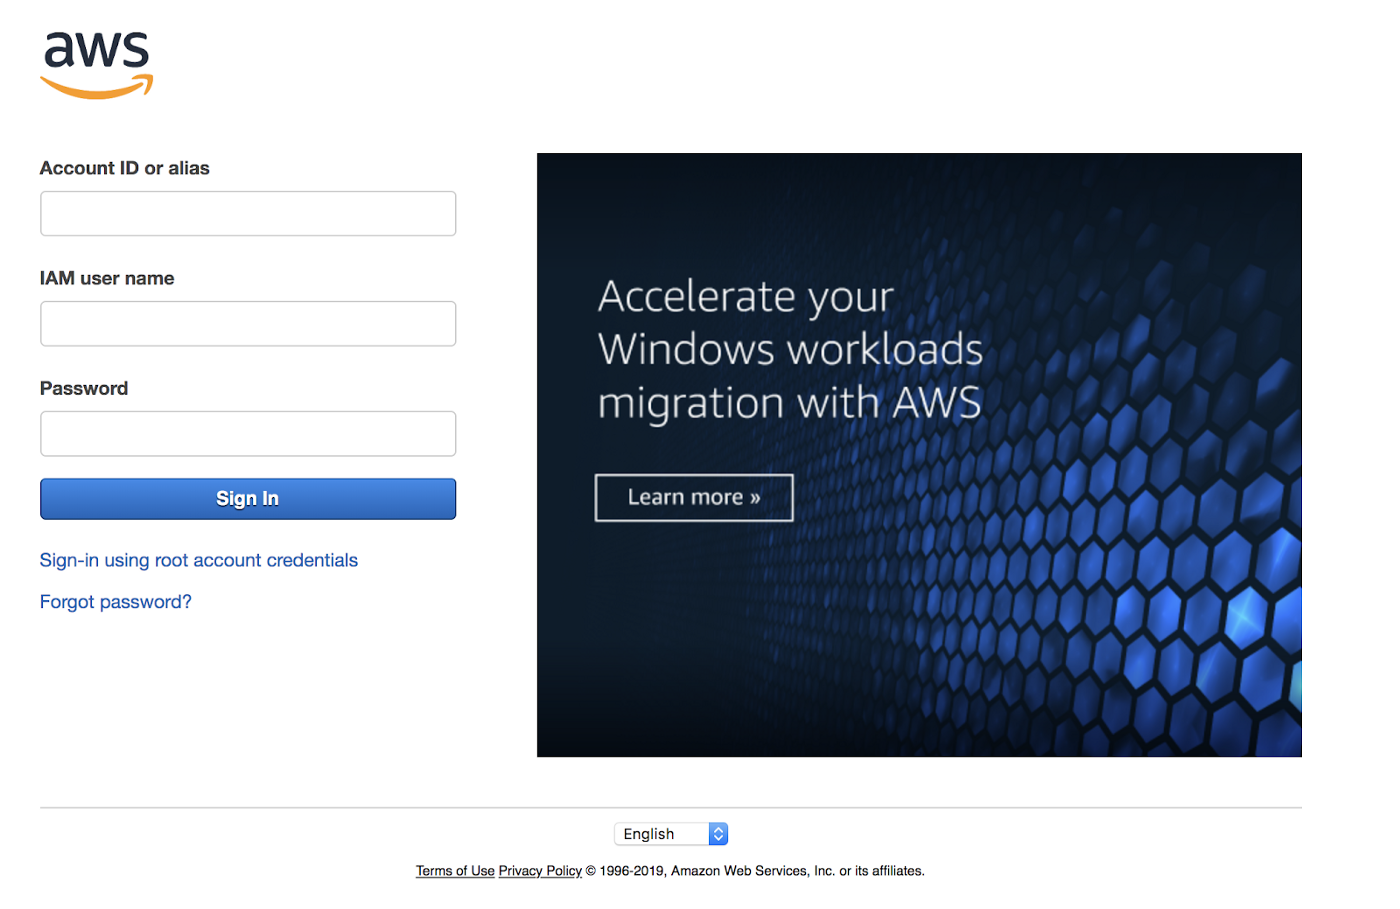
Source: Snapshot of the aws console page: Create AWS EC2 Instance step by step
After successful sing in, Now you can see the below screen ( Make sure have permission for S3 and EC2 at least )
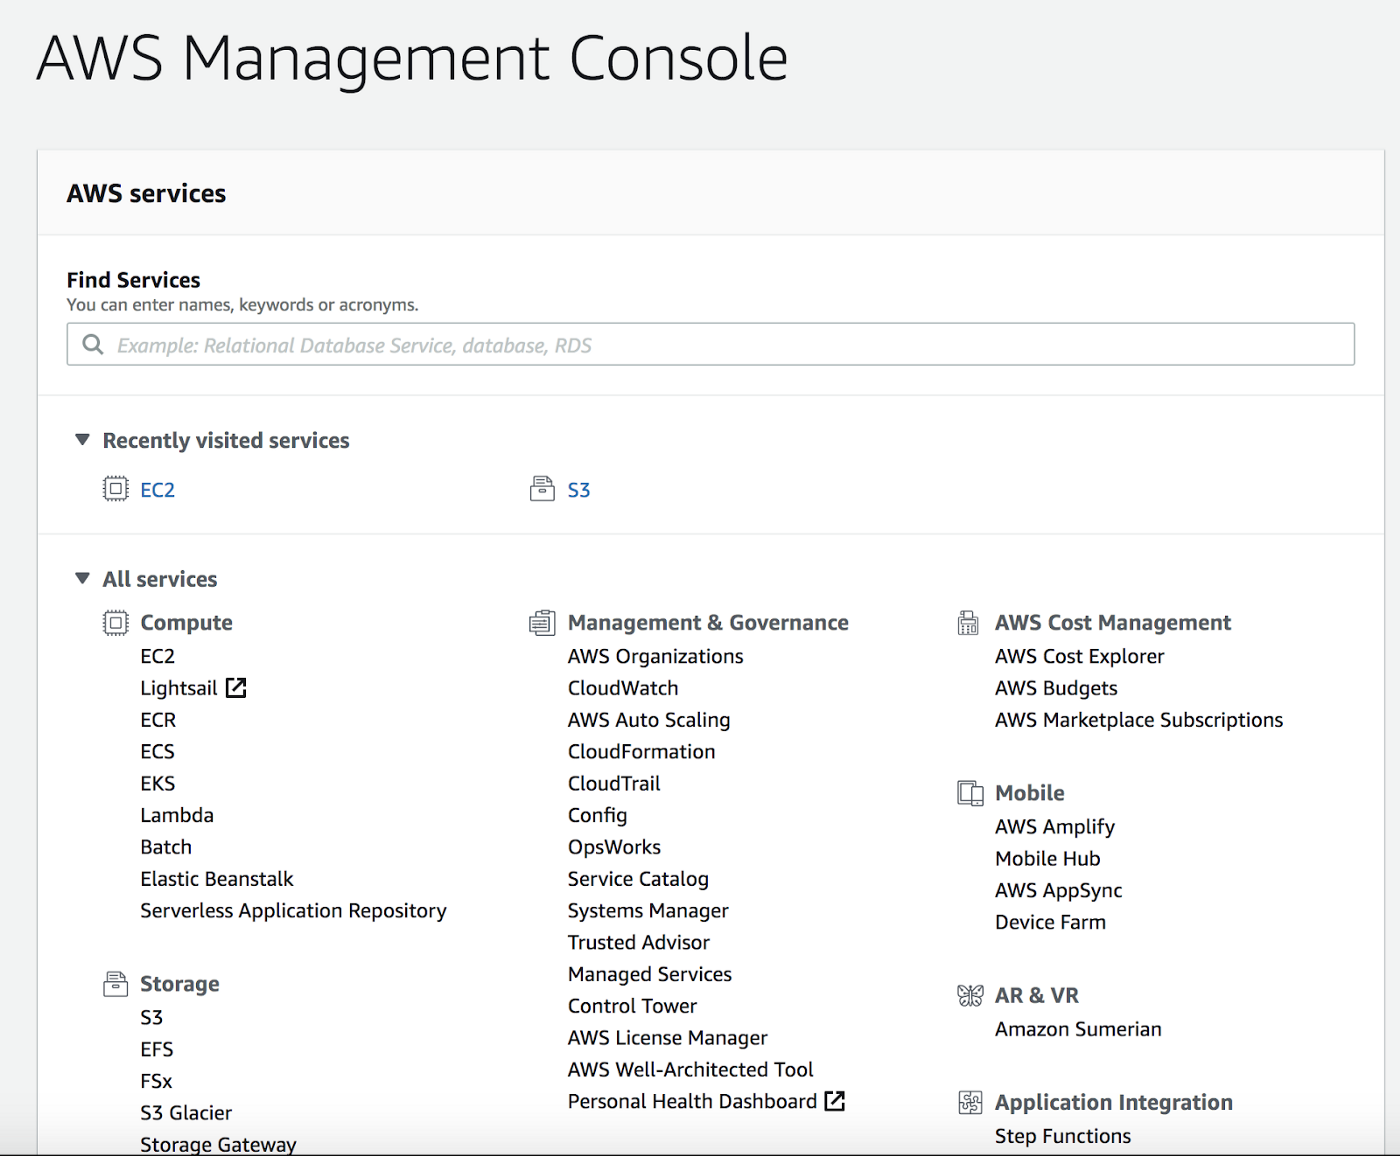
Source: Snapshot of the aws console page: Create AWS EC2 Instance step by step
Step 2: Now click on “EC2”:
You can see the following screen and click on Launch Screen:
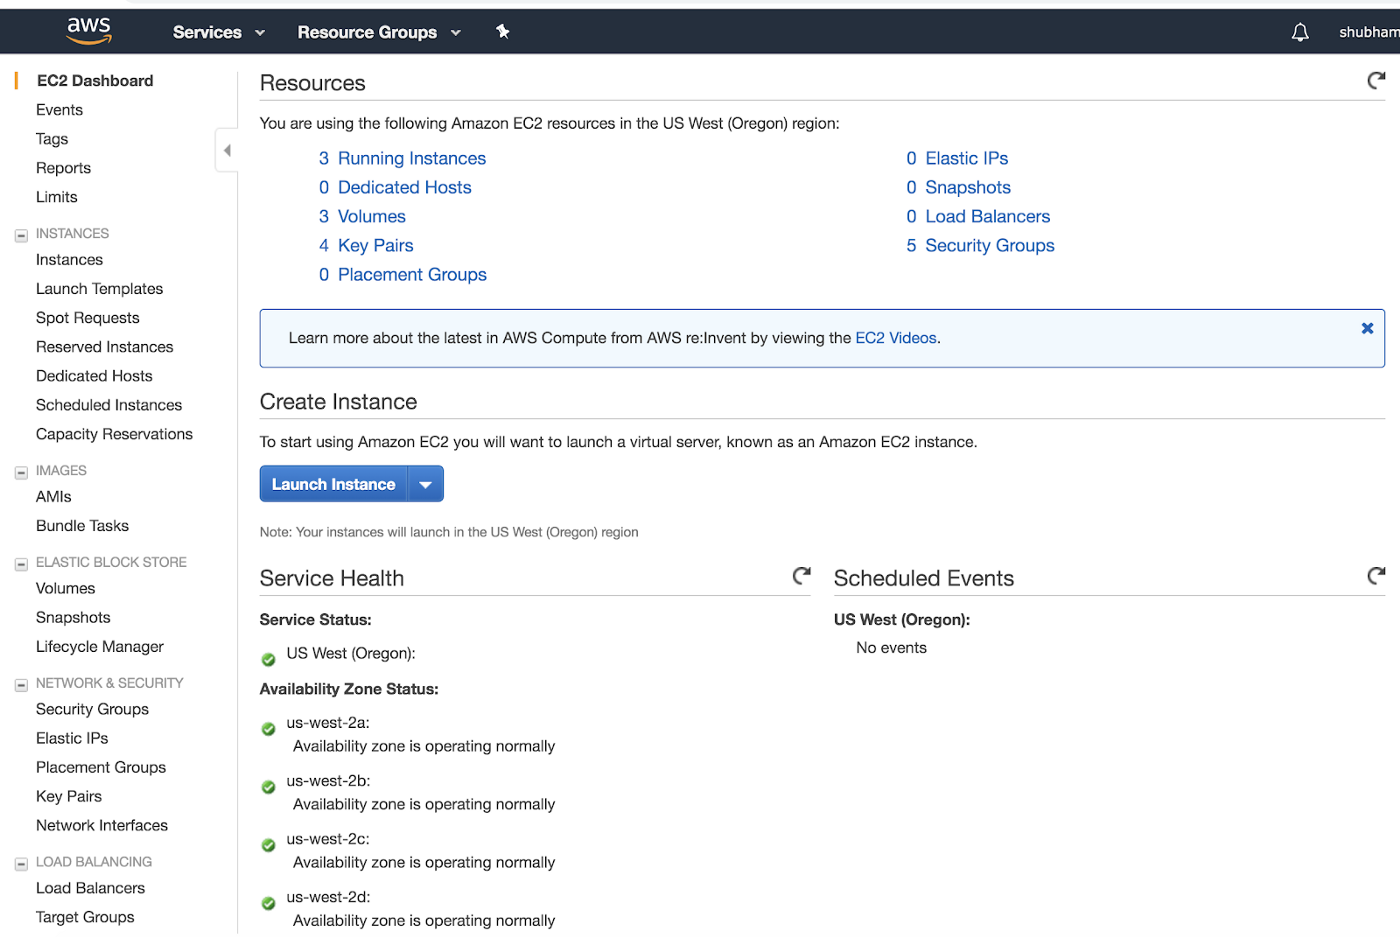
Source: Snapshot of the aws console page: Create AWS EC2 Instance step by step
Step 3: Choose Amazon Machine Image ( AMI ) Select the OS for instance:
After clicking on Launch Screen, You can see the following screen and select “Ubuntu Server 18.04 LTS (HVM), SSD Volume Type”:
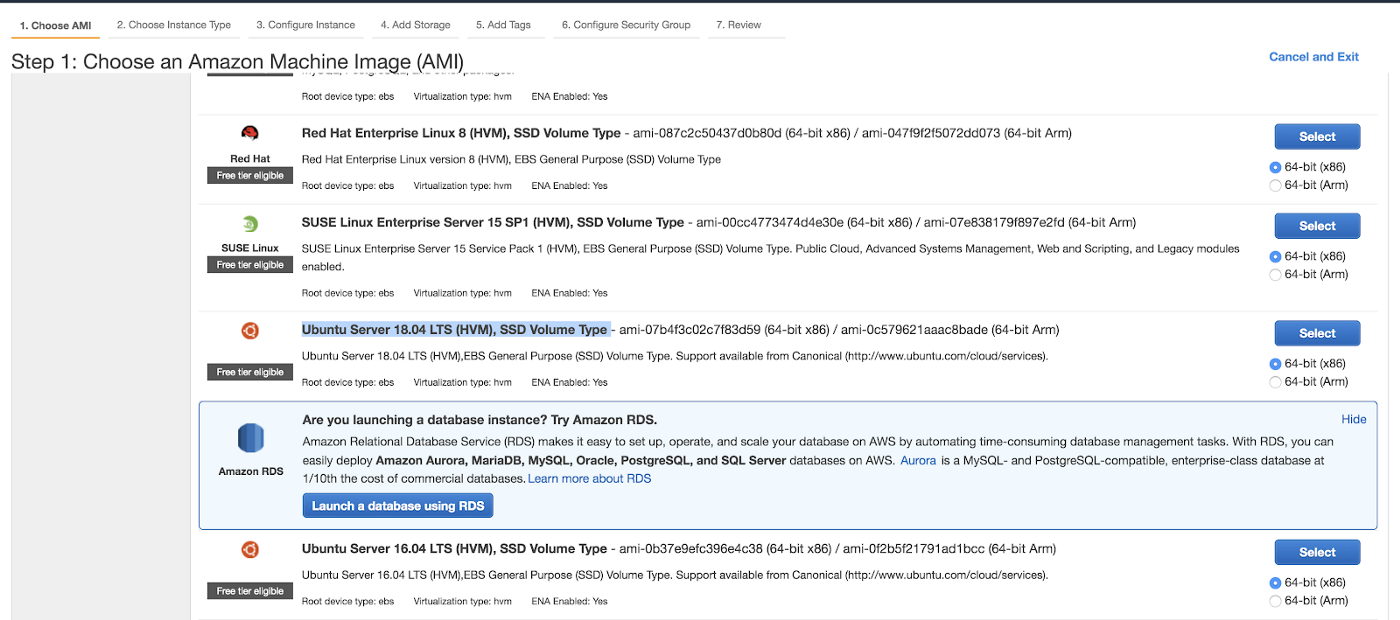
Source: Snapshot of the aws console page: Create AWS EC2 Instance step by step
You can choose any of the OS, but for learning, let’s click on select in front of Ubuntu Server.
Step 4: Choose an Instance Type, you can see multiple options as :
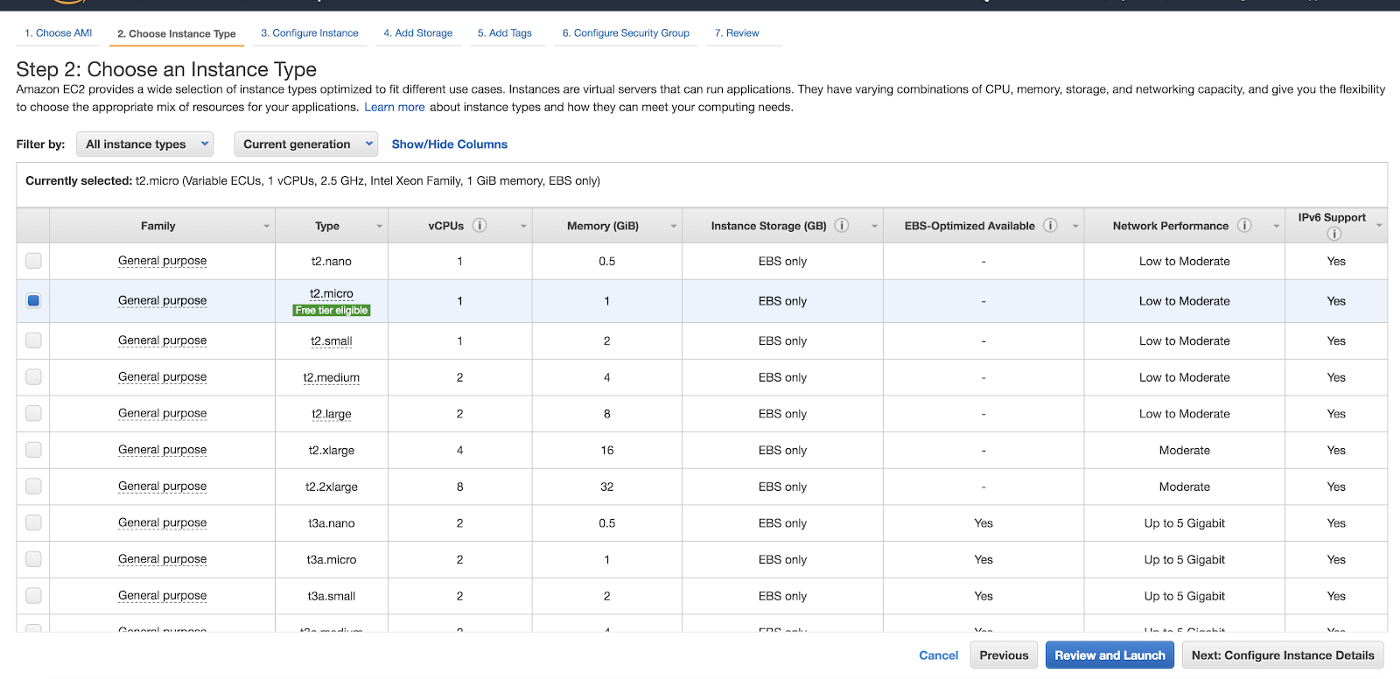
Source: Snapshot of the aws console page: Create AWS EC2 Instance step by step
If you want to create an instance for free then you need to select “t2.micro” but it has so many limitations like limited memory, limited process.
So here I am selecting “t2.medium” so that I can explain to you in a better way ( You can select “t2.micro”, nothing will be changed ).
After selecting the Instance type click on “Next: Configure Instance Details”.
Step 5: After clicking on “Next: Configure Instance Details” you can see the following details:
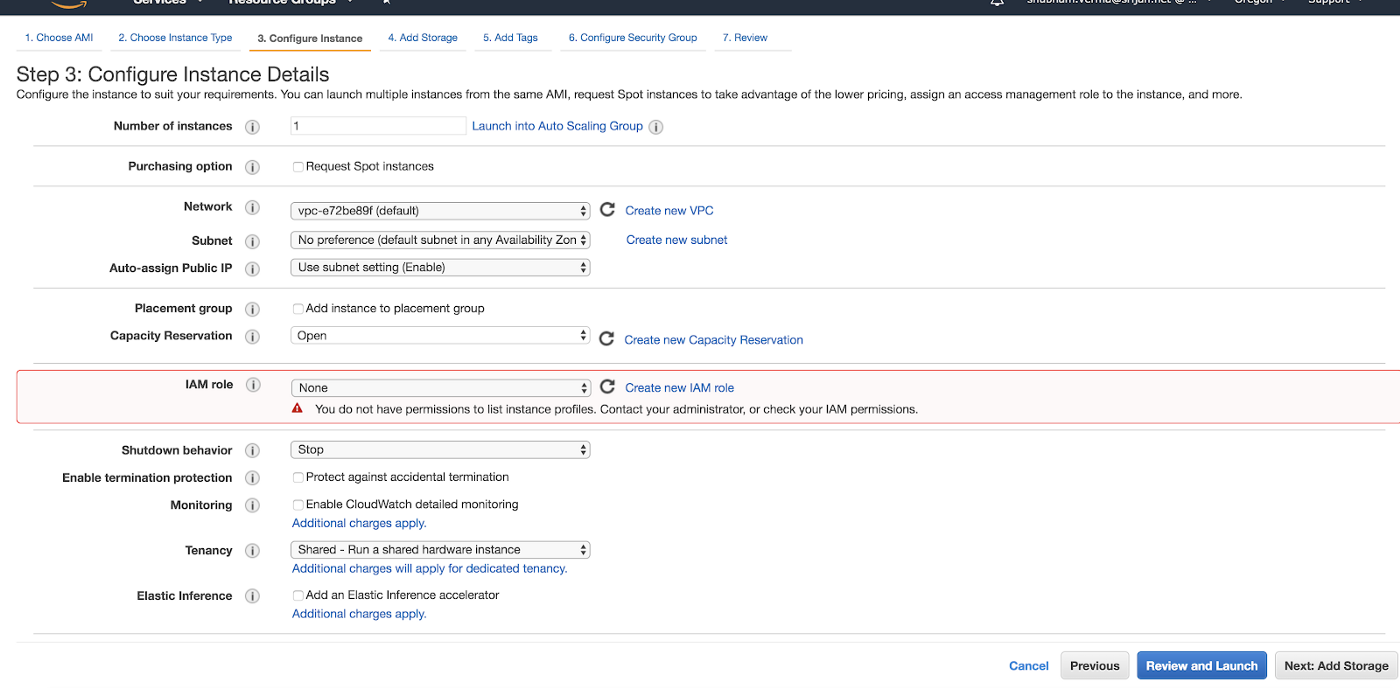
Source: Snapshot of the aws console page: Create AWS EC2 Instance step by step
You need to select the following things as in the below image:
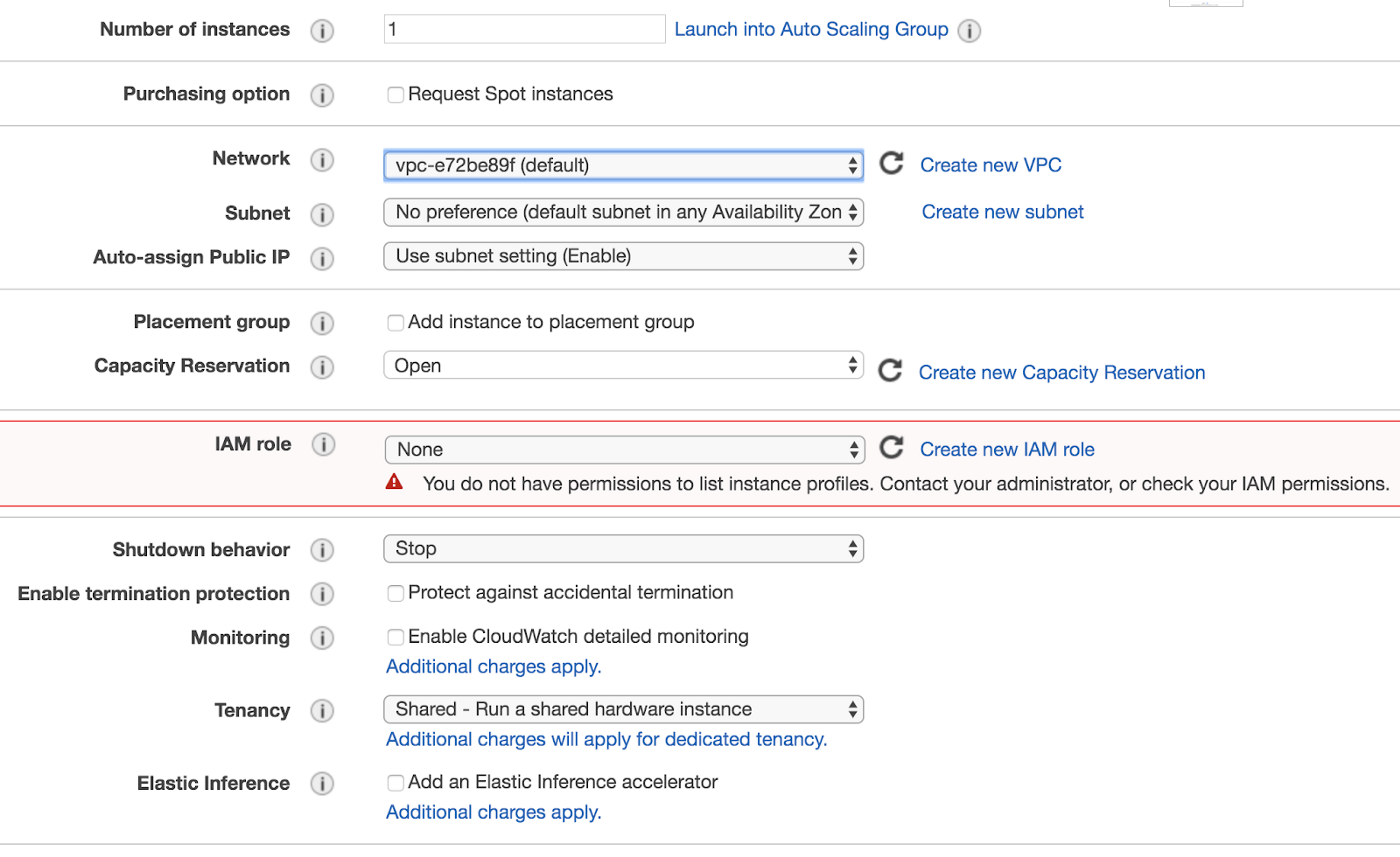
Source: Snapshot of the aws console page: Create AWS EC2 Instance step by step
Step 6: Now you need to click on “Next: Add Storage”:
After clicking on this, you can see the below screen:
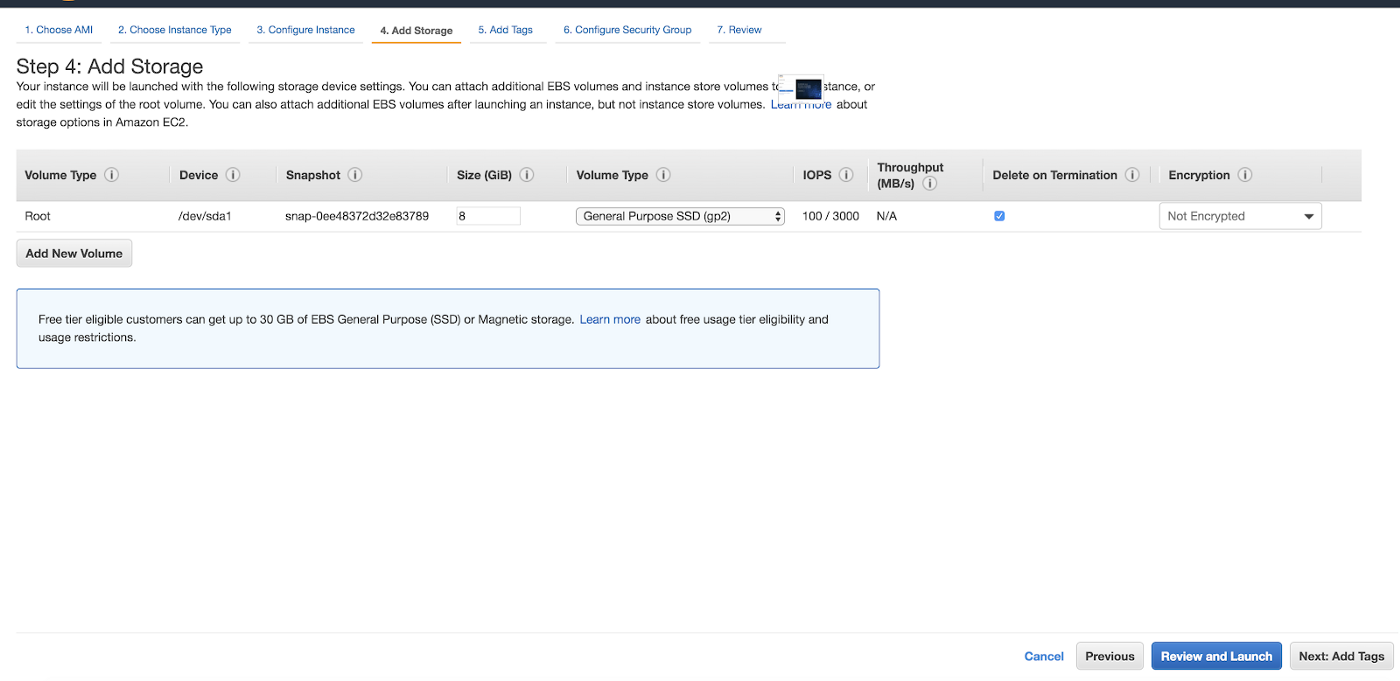
Source: Snapshot of the aws console page: Create AWS EC2 Instance step by step
And your selected options would be like this:

Source: Snapshot of the aws console page: Create AWS EC2 Instance step by step
Step 7: Now click on “Next: Add Tags”, After clicking on “Next: Add Tags” you can see the following screen:
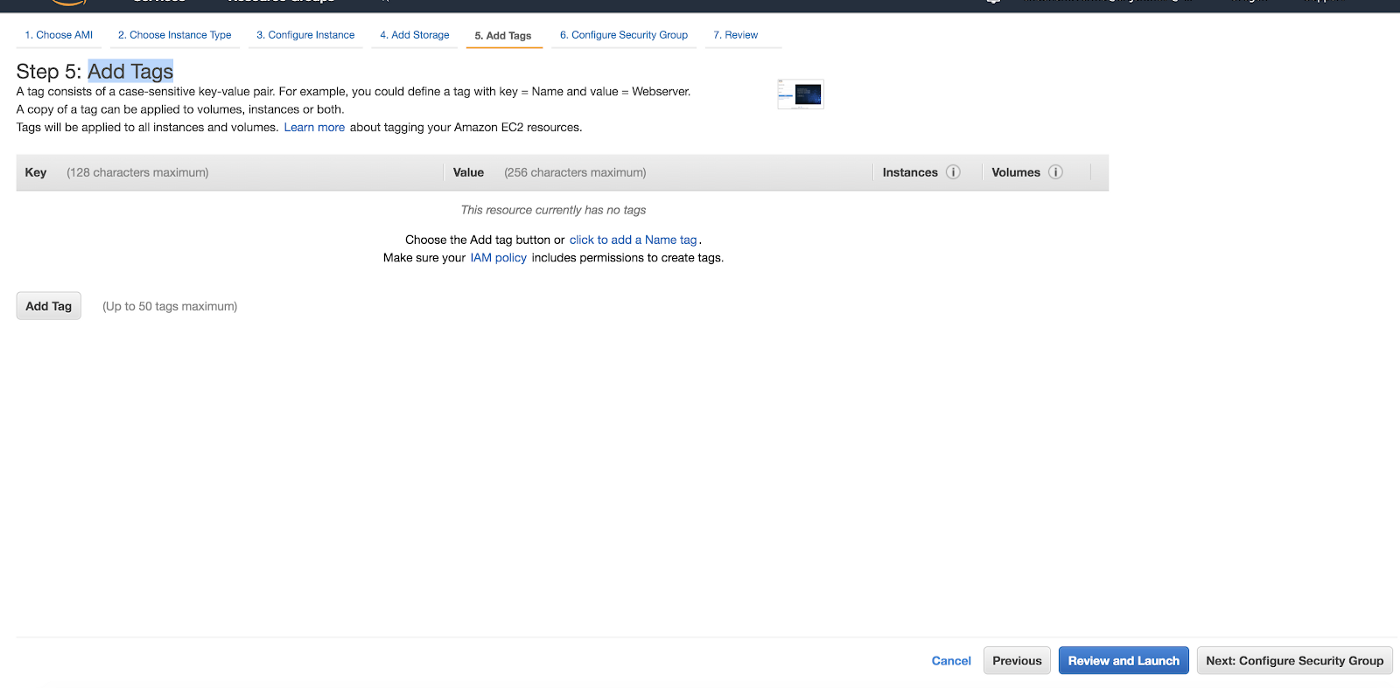
Source: Snapshot of the aws console page: Create AWS EC2 Instance step by step
Now you need to click on “Add Tag” to add a name to describe this instance, I am entering “demo-instance” as key and also for value as:

Source: Snapshot of the aws console page: Create AWS EC2 Instance step by step
Step 8: Now Click on “Next: Configure Security Group” after clicking on “Next: Configure Security Group” you can see the following screen:
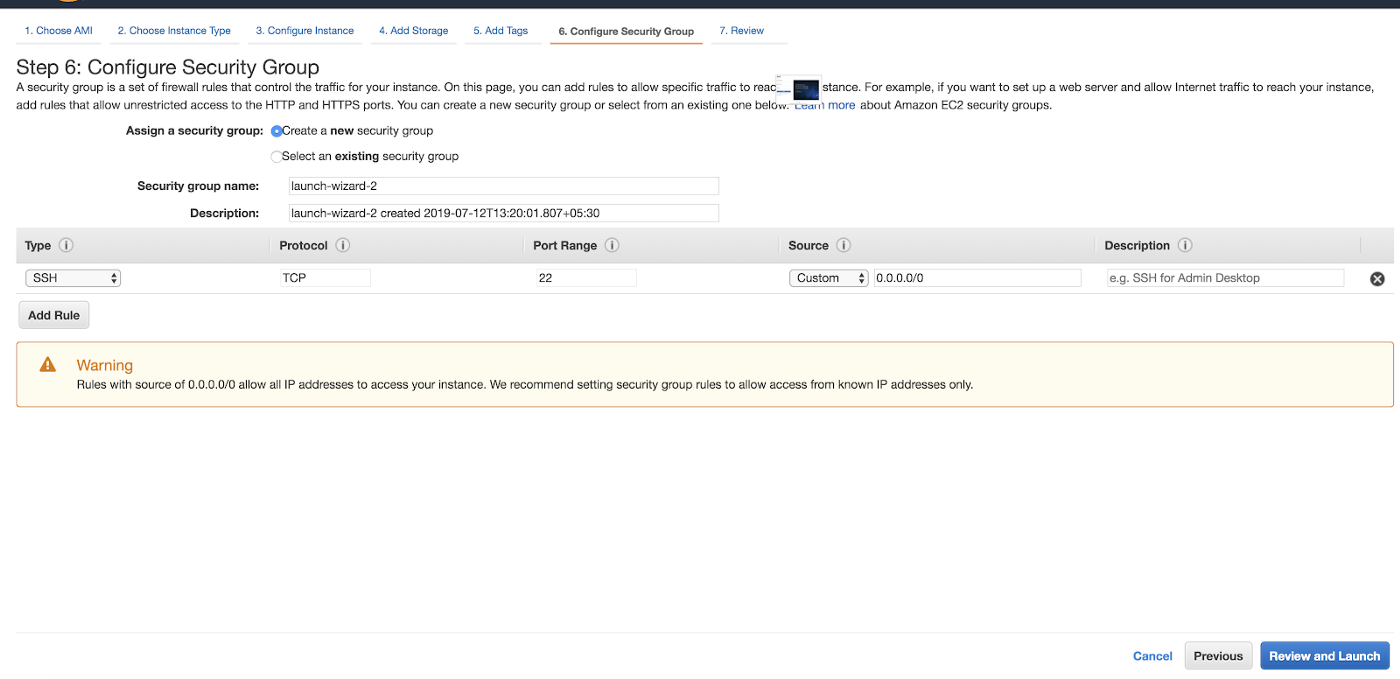
Source: Snapshot of the aws console page: Create AWS EC2 Instance step by step
Step 9: Now you need to select as:
Assign a security group: Create a new security group
Security group name:demo-instance
Description: demo-instance created 2019–07–12T13:20:01.807+05:30( You can enter any name and description
)
Now enter “SSH for demo-instance” in the description box for SSH.
Now it looks like:

Source: Snapshot of the aws console page: Create AWS EC2 Instance step by step
Step 10: Now click on Review and Launch, After clicking on “Review and Launch” you can see the following screen and see the all info as:
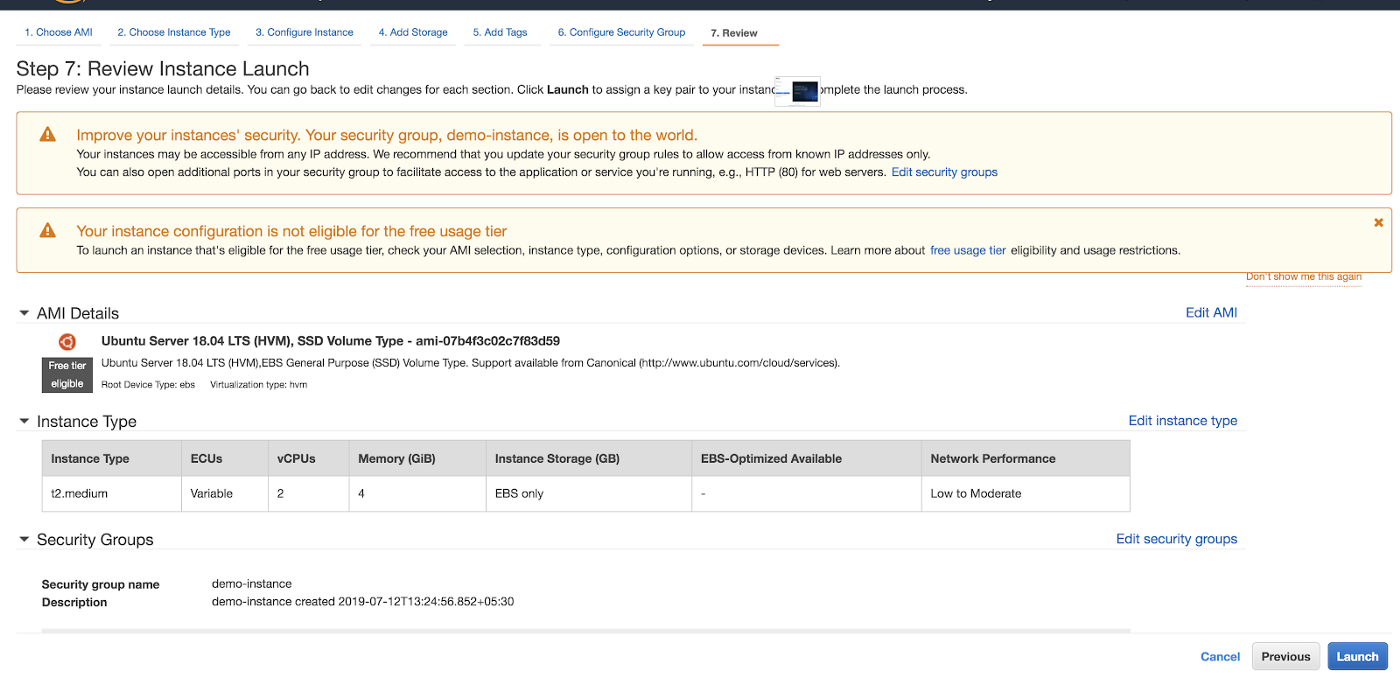
Source: Snapshot of the aws console page: Create AWS EC2 Instance step by step
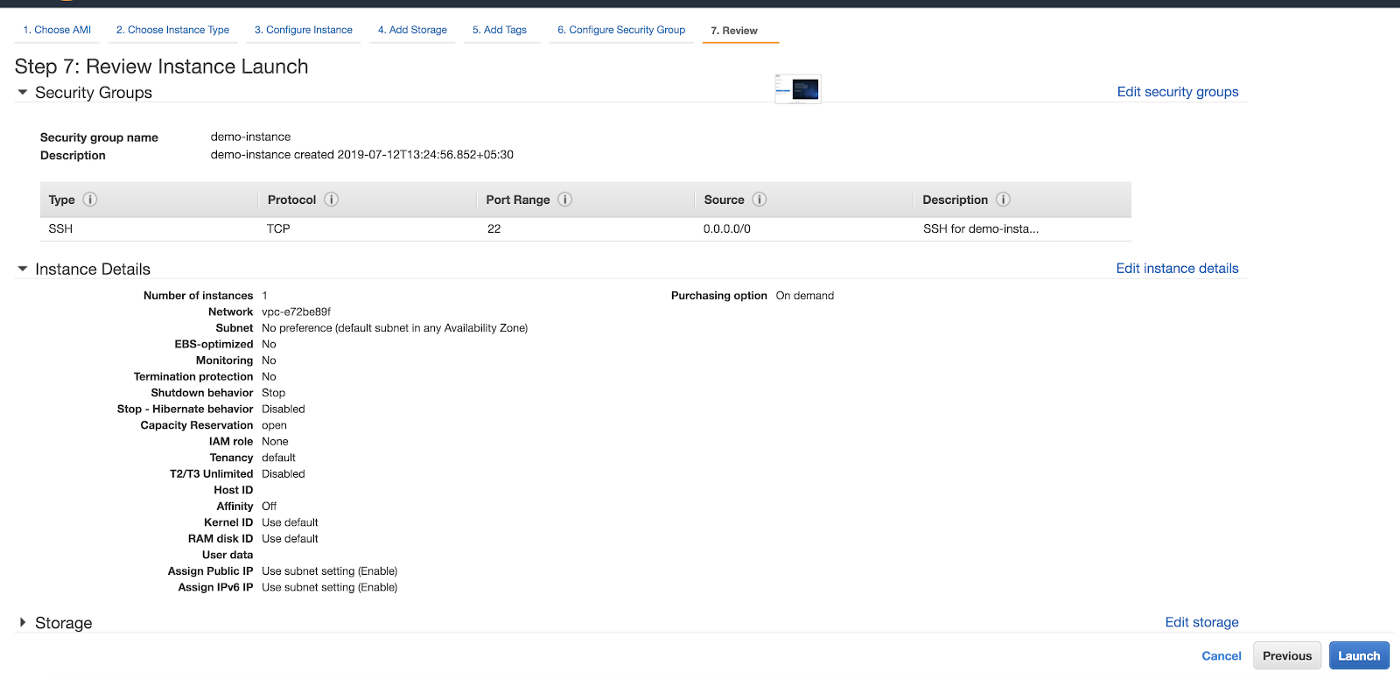
Source: Snapshot of the aws console page: Create AWS EC2 Instance step by step
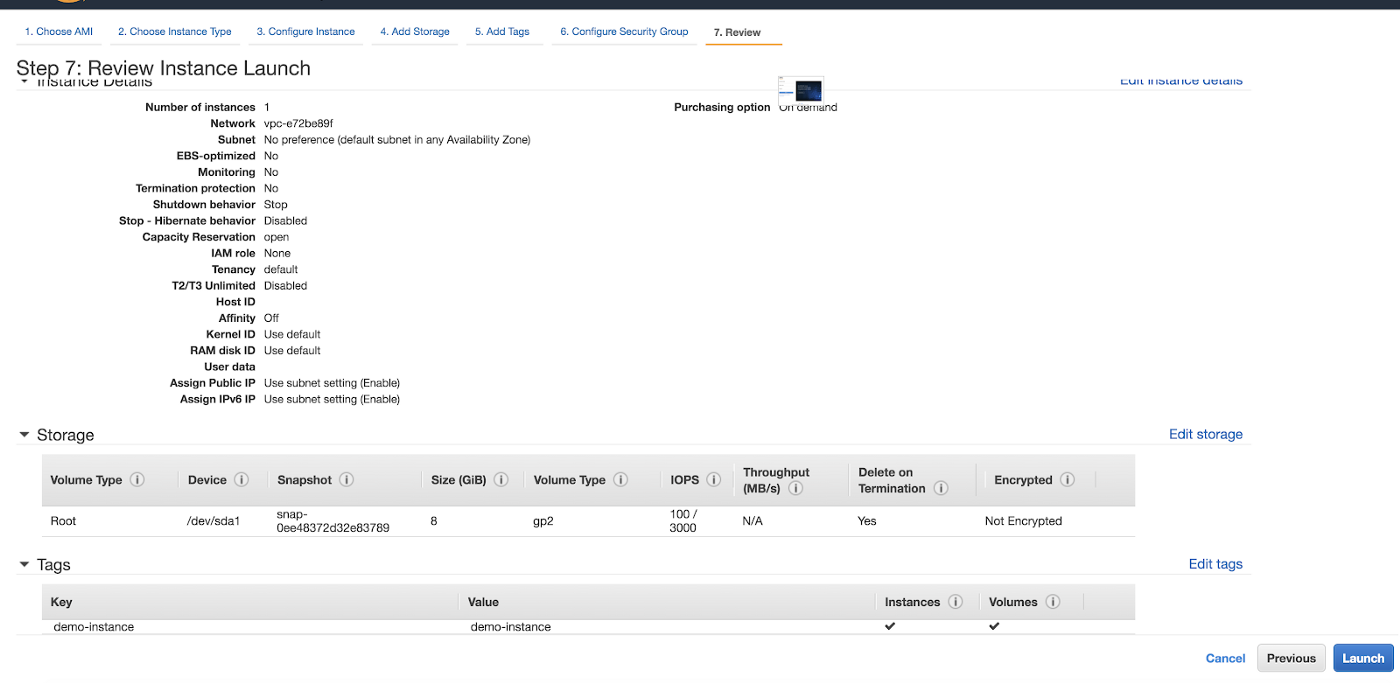
Source: Snapshot of the aws console page: Create AWS EC2 Instance step by step
Step 11: Now click on “Launch”
After clicking “Launch” you can see the following screen:
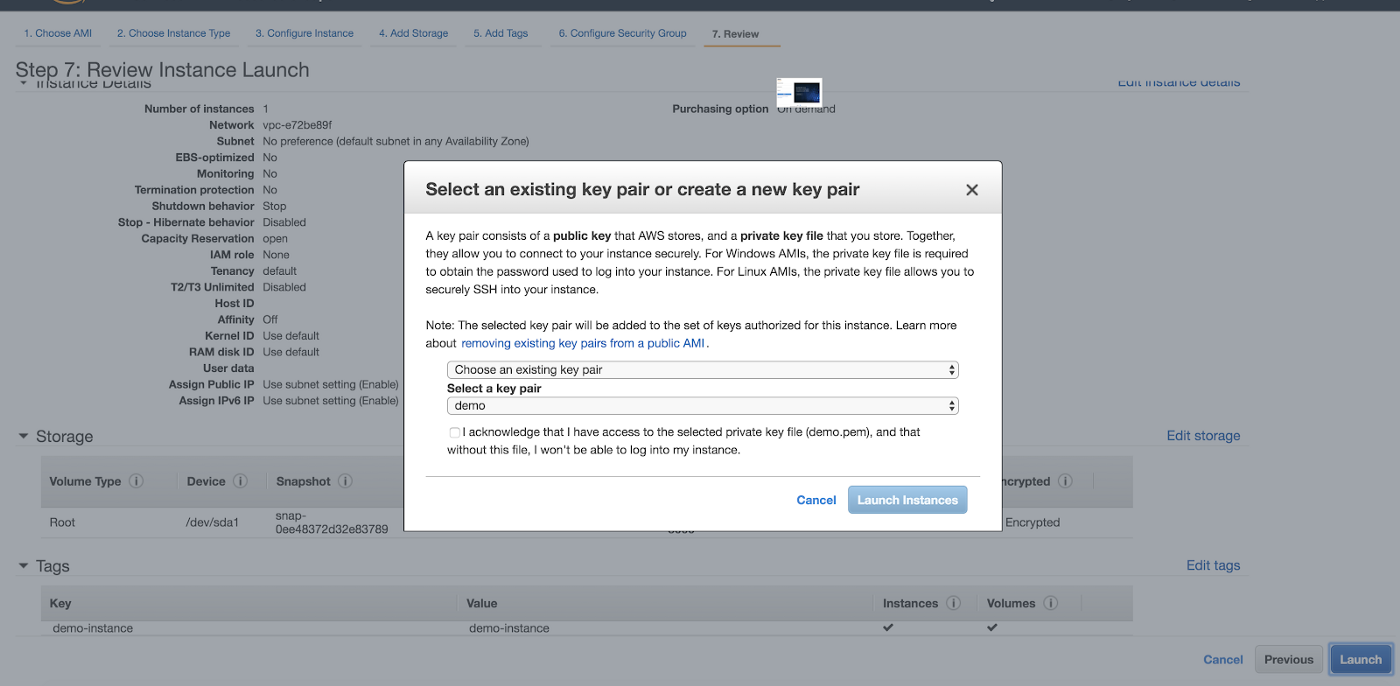
Source: Snapshot of the aws console page: Create AWS EC2 Instance step by step
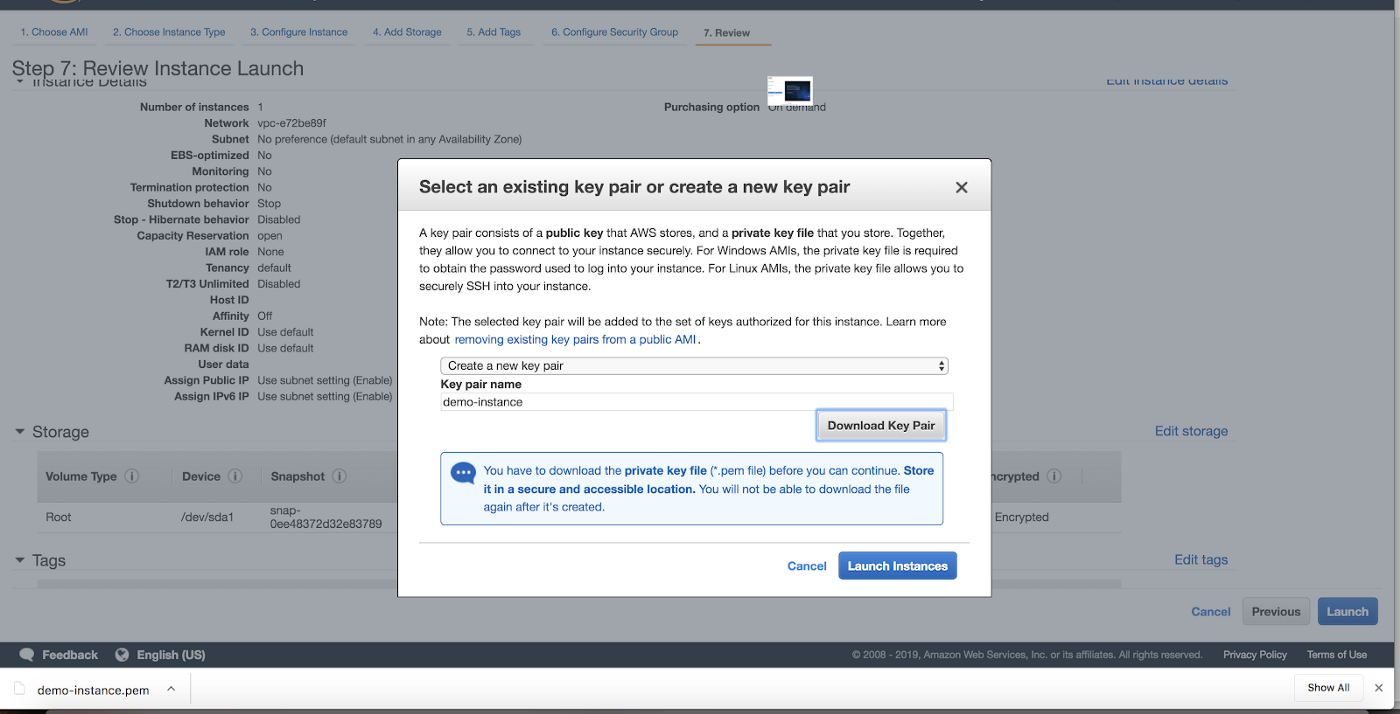
Now you need to create a new security key pair to connect to the terminal for this instance.
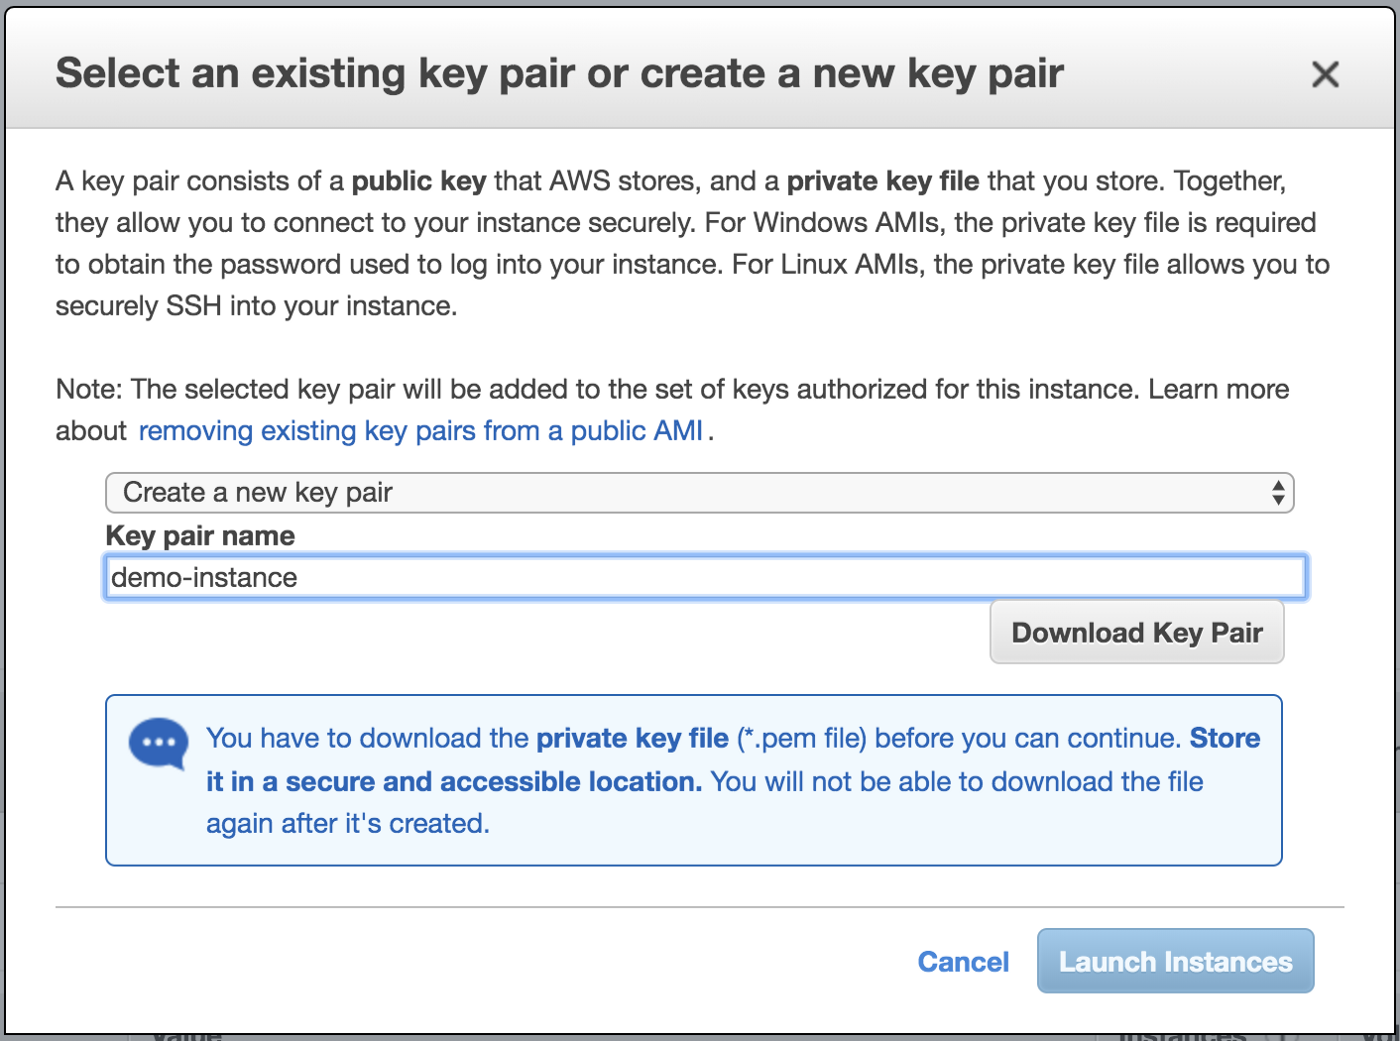
Source: Snapshot of the aws console page: Create AWS EC2 Instance step by step
Source: Snapshot of the aws console page: Create AWS EC2 Instance step by step
Select “Create a new key pair” and enter a key pair name “demo-instance” and download the
“demo-instance.pem” file by clicking on “Download key pair” button. Make sure you will download the
“demo-instance.pem” file otherwise you will get the problem to connect.
Now copy this “demo-instance.pem” file and save it in the desired location ( AWS demo/demo-instance.pem”
)
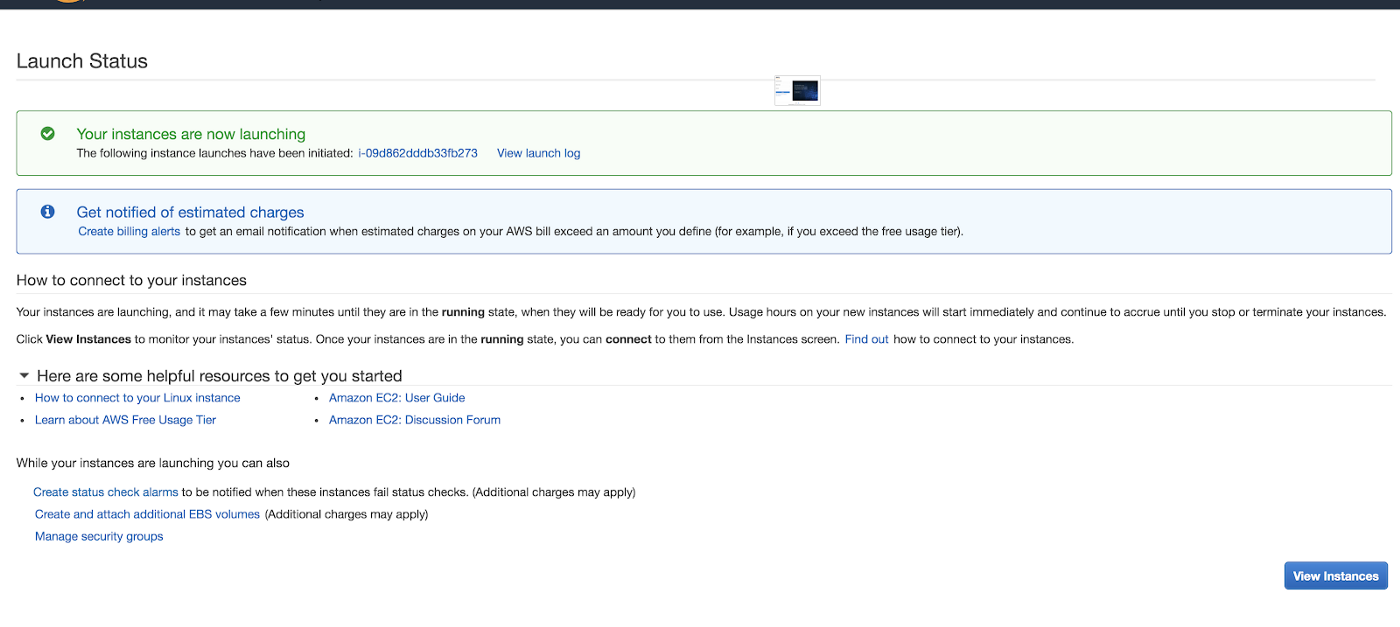
Step 12: Now click on “Launch Instance”. After clicking on “Launch Instance” you can see below screen:
Source: Snapshot of the aws console page: Create AWS EC2 Instance step by step
Now click on “View Instances” to see all instance lists and you can see the IP address ( IPv4 Public IP ) of this instance, This IP will be used when you will connect to this instance using the terminal or you will map with the domain name.
Summarizing:
                    * We have created an AWS instance.
                    * We have a Public IP like 34.219.193.28
                    * We have a demo-instance.pem file
                    All the above info/data will be used to take the remote access of this instance.
Congrats… Your AWS instance is created now.
Strongly Recommended Books For You:
Reading books opens the door to allow in more lights, If we want to know a man of rare intellect, try to know what books he/she reads.For India:
For Other Countries (United States, United Kingdom, Spain, Italy, Germany, France, Canada, etc)
Thank you
I appreciate you taking the time to read this article. The more that you read, the more things you will know. The more that you learn, the more places you'll go.
If you’re interested in Node.js or JavaScript this link will help you a lot.
If you found this article is helpful, then please share this article's link to your friends to whom this is required, you can share this to your technical social media groups also.
You can follow us on our social media page for more updates and latest article updates.
To read more about the technologies, Please
subscribe us, You'll get the monthly newsletter having all the published
article of the last month.


